
Connecting to an instance and attaching volumes
Connecting to your instance
By now we should have at least one analysis system in our AWS platform for capturing evidence. We will now need to connect through to this system using our key files so we can configure extra storage and with some analysis tools.
If you haven’t already configured key pairs yet you can access these from the EC2 ‘Network and Security’ menu. It goes without saying that once created you should guard your key file with your life.
Once we have our SSL key file, we can follow the standard AWS process for connecting to our instance.
For Linux instances via SSH:

Or for Windows instances via RDP:

Attaching Volumes
As previously discussed, we can attach storage volumes for evidence while configuring our instance or create these after the fact through the ‘Volumes’ menu in EC2. We can also use this method to attach a snapshot as a volume to our analysis instance for imaging.

As with creating new instances, you will want to record the volume name and assign it some tags for tracking storage volumes. You may also wish to use this feature for evidence naming later on when you are acquiring evidence from AWS.

Once you have your volume created you can choose the instance for which to attach it. This is done by selecting the ‘Actions’ button from the ‘Instances’ menu in EC2.
It should be noted that physical device names will need to be defined based on whether your systems are Windows or Linux.

Our block device should now be attached to our Ubuntu instance now and we can query that by listing block devices in our instance.
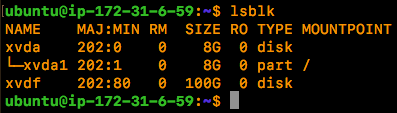
As our instances are virtual in AWS the Xen storage device format is used (this caught me out the first time around). Our last task will be to create a file system on our block device.
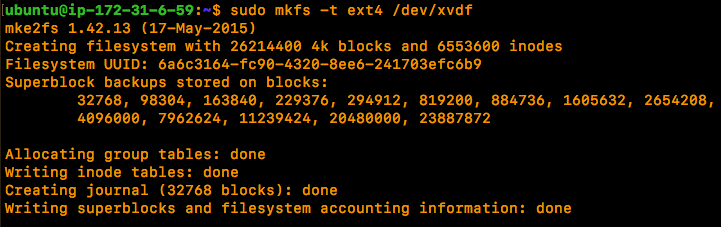
Once we have our new evidence storage volume attached we can create a mount point and mount our block device.

That’s about it, we now have an Ubuntu instance configured with a secondary EXT4 storage volume which can be used as a target disk for forensic images or for storing other files/forensic tools for analysis.
Next up, taking snapshots of existing volumes attaching AWS volumes for forensic imaging.
Reference:
https://docs.aws.amazon.com/AWSEC2/latest/UserGuide/ec2-key-pairs.html
https://tools.ietf.org/html/rfc1421
https://tools.ietf.org/html/rfc1424
https://docs.aws.amazon.com/AWSEC2/latest/UserGuide/ebs-creating-snapshot.html
https://askubuntu.com/questions/166083/what-is-the-dev-xvda1-device#166087

[…] at Salt Forensics continues his series on AWS showing how to connect to an instance and attach a local volume, as well as how to upload an E01 image and a shoutout to VirtualHere for […]
LikeLike